So everyday I have been stalking our photographers blog eagerly anticipating our wedding photo sneak peek. So last night when I checked I was almost peed my pants in excitement on seeing this post 😀
I honestly could not be happier with how these turned out… Of course I immediately shared on twitter and one of the replies is what gave me the idea of where to start with my recaps. If you haven’t picked up on my blogging ADD yet, you should know I will not be doing these chronologically 😛
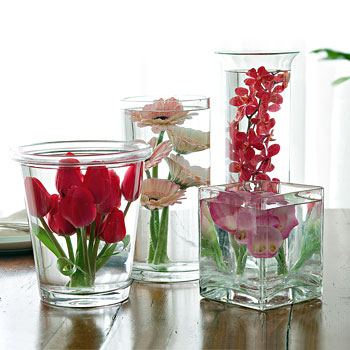
So I know I have really been all over the board with the evolution of our centerpieces. I remember back when our centerpieces started out being something like this…
 {Ruffled}
And then remember how after The Budget Savvy Bride got married I fell in love with her centerpieces and wanted to use vintage stemware with lights and candles in them…
 {The Budget Savvy Bride}
Then remember way back when I mentioned picking our own homegrown sunflowers as a way to say money. Well that idea turned into picking wild sunflowers and putting them in mason jars as centerpiece bouquets…

{personal photo}
As you can see that idea didn’t look so lovely  So about 3 weeks out from the wedding I gave up on the idea of fresh flowers and we were back to the original plan of mason jar candles.
 {MOmilkman}
But wait the clouds opened up and the sun shined through and I shared with you all that post I just happened to stumble across on flowery centerpieces. So exactly 2 weeks before our wedding our official centerpiece plan was born.
 {Everyday by Rachel Ray}
Fast forward to 2 days before the wedding and there I am with my mom and BM Vic cutting wild sunflowers from the local fields.

 {personal photos}
We got this process down to a science. We focused on bunches closet to agricultural fields because these most likely got dusted with pesticides too thereby minimizing the number of bugs in them. Then one person sprayed bug killer for garden flowers on the desired stems while the other two cut them. We made sure to wear gloves to protect against thorns and long pants and boots/sneakers as protection from rattle snakes. I am pleased to say no snakes were spotted during this. Although both a snake and 4 tarantulas joined in the actual wedding festivities (more on that later)…
Once we got the flowers home we frantically cut all the stems at an angle under water because we working against the toll of 100 degree weather on our poor little blooms. Once they were all cut (we made sure they were taller than the final needed length) we stuck the bundles in our mason jars, filled with water and tossed an aspirin tablet. Then we placed them inside the fridge.
IMPORTANT NOTE: If you try doing your own flowers make sure you have no fruits or vegetables in the fridge with your flowers. Tomatoes are the worst of these! Fruits and vegetables emit Ethylene gas which causes flowers to wilt and die O_O What really helped our flowers were the Envirashield fridge panels we keep in our refrigerators. I used to work for the company and use these panels everywhere. They are filled with an all natural mineral called Sorbite that absorbs moisture, gases, and odors out of your fridge. A lot of big time florists and restaurants use these to keep their products fresh. Send me an email if you want info on purchasing the home use size panels. The great things is they last forever. Literally! You just take it out once a month and leave it on your counter for a day and the mineral recharges itself.
The next morning BM Vic and BM Lyz sat down with me to get working on the actual centerpieces. It took Lyz’s genius to figure out how to get the flowers to stay in place perfectly and I’ll share the scoop with you since it took us a few tries to figure it out. (Sorry for the lack of photos but we were too busy trying to get everything done O_O)
We started by placing a handful of marbles at the bottom of each mason jar then filling them to about 1″ from the top with room temperature water. Then placing the bloom side down we dipped our flowers into the water. We would then push the stem up against the ridge at the top of the jar on the opposite side from the head of the flower. This kept the flowers from floating to the top. Once we filled the entire jar using this method (about 6-7 blooms) we tossed in another aspirin and placed the jar back in the fridge. Make sure you stagger the height of your stems so that the blooms are at varying levels in the jar
If you change the water every other day, your flowers will actually last completely submerged like this for a good week 🙂

{Sixfourteen Photography}
We had already wrapped the twine around the rims of each jar and tied a bow. I think this dressed them up a bit 🙂
Overall cost of Floral Centerpieces:
Mason Jars – Free from my grandma
Marbles – Free from past weddings
Twine – $1 at Target
Flowers – Free from local fields
Bug Spray – $6 at Walmart
Grand Total – $7 for 29 centerpieces
More info and photos on our other centerpieces coming later 🙂
Let me know if any of you try these beauties. I’d love to see your pictures 🙂
Filed under: Recaps | Tagged: centerpieces, cheap flower centerpieces, mason jars | 6 Comments »


 {source}